
This basically sums up my approach to coping mechanisms: distract yourself and grin, regardless of your circumstances. It's catchy, to boot.
1.27.2009
Additional deep thoughts with Cat
I'm at a point where I'm trying to figure out the purpose of this blog. Is it an update for friends and whichever family members happen to Google me? Is it supposed to highlight my writing? If so, it's a poor example! Should I specialize somehow to show off my knowledge of a particular subject? This of course works very poorly for someone who is familiar with everything and an expert at nothing.
I've been blogging for years, mainly with the narcissistic purpose of documenting my thoughts, my life, and letting interested parties follow along. I don't know if I feel the need to broadcast my feelings as much anymore.
Not that I don't love you, Blogger community. I just feel I need to find direction. I post about politics, photoshop, video games, fashion, etcetera, but never in all that much detail. I don't have an understanding of the history and context of fashion, for example. I just know what I like. Ditto with games - I'm not going to be able to discuss the games to which the one I'm playing makes reference to. Whoa, that was one heck of an awkward sentence. Forget it ever happened.
Oh well. Perhaps I'll get over this desire to find some direction and instead just go back to writing about whatever strikes my fancy.
1.26.2009
Bored bored bored
I'm at the point now where everyone I meet reminds me of someone else I already know, or have been exposed to. New guy at work looks like Paul Rudd. OMG, that girl from training is totally like T. from high school! Wow, you should meet my friend Rob, you two are totally alike.
Unfortunately I judge these new people by the standards set by their semi-dopplegangers. It throws me off if they deviate from the mold I've created for them in my head.
Maybe I'm just nuts. Or overly bored on a Monday. Both?
Unfortunately I judge these new people by the standards set by their semi-dopplegangers. It throws me off if they deviate from the mold I've created for them in my head.
Maybe I'm just nuts. Or overly bored on a Monday. Both?
1.23.2009
If today were perfect
I would be in a cabin in the woods with a roaring fireplace and comfy sofa. There would be hot chocolate and a good book. And maybe a puppy.
Dinner would be delicious and calorie-free. Then, in the evening I'd head off to choir rehearsal.
Actually, I'd settle for the fireplace, couch, book, and hot chocolate. That would be heaven.
Dinner would be delicious and calorie-free. Then, in the evening I'd head off to choir rehearsal.
Actually, I'd settle for the fireplace, couch, book, and hot chocolate. That would be heaven.
Catching Up #3
Thanksgiving was all kinds of wonderful. Not only did I get to go to San Francisco for the first time in ages, I also got to hang out with my dad's side of the family (also for the first time in ages).
Lucky me - I had two thanksgiving dinners.
I brought this: Mashed Sweet Potatoes with Brown Sugar & Pecans
It may sound simple, but it's freaking delicious. Make sure to double the topping.
Lucky me - I had two thanksgiving dinners.
I brought this: Mashed Sweet Potatoes with Brown Sugar & Pecans
It may sound simple, but it's freaking delicious. Make sure to double the topping.
Cutetorial Edition 3: Etsy
Go to www.etsy.com
Login by clicking "login" on the upper right hand side of the page.
Enter your username and password. Click enter.
Click on "Your Etsy" at the very top part of the page.
Click on "Add new item" on the middle lefthand side of the page.
Enter a title, description, and the individual materials used to make the item. The materials part should be formatted like this: "clay, polymer clay, polymer, fimo, wire, laquer" or something similar.
Click "Next" at the bottom part of the page.
Click on the drop down menu and select "Jewelry." From there, type in any "tags" you think may apply to the item. Examples are "earrings," "people," "clay," etc.
Click "next"
Choose a price, make the quantity 1, create a "shipping profile" of your own to tell people how much you will charge for shipping. Click "next"
Next browse and upload your cute picture. You may need to "resize" the pictures to be small enough to fit, but that will probably require trial and error. Make sure that the first picture you upload is the prettiest – it will be the one that shows up when people find your cute stuff! Click "next"
Double check all of your cute work – then click "Finish"
Easy peasy.
Cutetorial Edition 2: Uploading Images to Cafepress & Creating Items
Keep in mind, some prep work is required before handing a cutetorial over to a parent or grandparent. In this edition, I assume that a Cafepress shop has already been set up. Perhaps I'll put up a how-to on that at a later time.
How to upload images to Cafepress and put them on products:
Go to www.cafepress.com.
Click on “Sign In” on the top right of the page.
Enter email address: my@email.com
Enter password: pass1234
Click on “My Shop” (Whatever your shop name is.)
Click on “Manage Sections and Products.”
Click on “Add a Section.”
Click on “I’d like to add one design to many products.”
Give the section a name, such as “Blue Teapot III.”
Click on “Select new image.”
Click on “Upload new image.”
Click on “Browse” and select the file you want to upload.
Click on the check box that says, “I agree to the terms and conditions…”
Click on the upload button. Your image will start uploading!
Once the image uploads (which can take some time), give it a new name and insert some image tags – words that describe the picture. Seperate the words with a comma. Try and use things that other people might think of that would relate to your product. Also select a category for it (usually “Art”) from the drop down menu. When you are done, click “Done.”
This should take you back to your image folder. Click on the image you just uploaded.
This will take you back to the “Section Details” page.
Click on “Premium” markup for your shop prices. You can also adjust them individually once you’re editing the products later.
Click on “Choose Individual Products.”
Select the products you like the look of. Do this by clicking “Make selections” on, for example, the “Shirts (short)” section. Either click once on the products you like, or use the dropdown menu to select “1” of each of the products you want to use. When you have selected everything, click on “Add products.”
Go through each of the product categories and select the ones you want to use. When you are done, click on “Add these products” on the right side of the page.
These products will now show up in your section. Go through and click on each of them. You can edit them by uploading a different image for them (if you want), giving the product a name, such as “Blue Teapot III,” adding a description, changing the price markup, adjusting the size and orientation of the image, etc. When you are done, click “Save and Finish.”
Yay! You are done! (Well, sorta. Now you should add those products to other related sections, if you already have them set up.)
You can rearrange the products in your section, if you want to put the coolest items at the top. (Such as calendars – whatever the kids are buying these days.) Select the tiny box that says, “Check all items.” Then using the drop down menu, click on “Rearrange items.” Select a product in the list that shows up and use the up and down arrows to arrange them in an order you like. When you are done, click “Save.” I try to keep the sections in alphabetical order to keep it easy.
Once you have created a product, you can put it in other relevant sections:
Up close to but not at the top of the page will be a little area that says this:
“Currently editing: Storefront > Blue Teapot III.”
Click on “Storefront” to go back to the front page of your products/sections/webpage.
Click on the existing section you want to add one of your completed new products to. For example, you could use: “Newest Designs.”
Once you are in the section, click on “Import.”
Using the file folder drop down system, select the product you just uploaded. To find it, click on the tiny arrow by “your store name.” Then click on the tiny arrow by “Blue Teapot III.” Then click on the folder with the name of the product you want to add. Click “Next.” You will be taken to a page with your product on it! Click the box by the item you want to add. Then click “Import.” That item will now show up in “Newest Designs.”
Sometimes I like to add whole sections instead of individual products. You can choose to organize it any way you like, but I try to do sections to make it as user friendly for customers as possible!
If you choose to add a whole “Blue Teapot III” section to “Newest Designs,” here is your how-to:
As we did previously, click on “Storefront” to go back to the front page of your products/sections/webpage.
“Currently editing: Storefront > Blue Teapot III.”
Click on “Newest Designs.”
Click on “Add a Section.”
Click on “I’d like to add one design to many products.”
Name your section the same way you did when you first created it. (“Blue Teapot III”.)
Click on “Select New Image.”
Select the same picture you used for you “Blue Teapot III” products.
Select “Premium markup.”
Click on “Choose individual products.”
Then click “Cancel,” on the upper right hand side of the product page.
You will be taken to a new page. Click on “Import products from another store or section.”
Click on the folder for “Blue Teapot III.”
Then click “Next.”
Click on the box by the items you want to add (probably everything, so you can click the box that says, “Check all items.”).
Click Import.
Ta da! You have finished the section! Yay!
1.14.2009
Cutetorial Edition 1: Using Photoshop Elements for Cafepress Image Preparation
A fair amount of my time has been spent writing computer program how-tos for my mom in the hopes of nurturing her e-commerce independence. I thought it may be a good idea to post only slightly modified versions of these tutorials, or as I call them, "cutetorials," here for all the world to see. There are most likely superior Photoshop and Cafepress tutorials discoverable with the help of the great Google god, but this seems to work well for my mom - a woman who seems fairly intimidated by computers. Enjoy.
P.S. I will do a secondary edit of this post at a later date, to make up for any gaps in logic. My apologies for any inconvenience in the meantime.
How to use Photoshop Elements to prepare a scanned image for Cafepress.
First you will need to go to the CafePress website to find out the required size of the image for your calendar/mug/etc. Later, you will upload your edited image to CafePress
The login page is located here: https://www.cafepress.com/cp/members/login.aspx?passthru=yes
Login Name: your@email.com
Pasword: pass1234
Click on “Your Shop Name”
Click on “Manage Sections and Products”
Click on “A section your daughter already made for you, probably Ginger the Gopher”
Now click on whichever product you would like to create a new image for. For the sake of our cutetorial, let’s use the pre-made calendar. So, click on “Ginger the Gopher Calendar Print.”
On the middle-left part of the page, you should see “Image Guidelines.” They should look something like this:
Image Guidelines
Size:
11 x 8.5 in. Full BleedH: 11.5 x 9 in. (trimmed on calendar to 11 x 8.5 in.)
DPI: 150 minimum
These are the specifications we will use in Photoshop Elements.
Go to Photoshop Elements and click on “File” then “New” then “Blank File.”
Change the “Width” to be measured in “inches” instead of “pixels.” Do the same for the “Height.”
Now set the width and height to match the image guidelines you got from cafepress. In this case, it will be 11.5 x 9 inches. (The end product will be trimmed to 11 x 8.5.)
Change the “Resolution” to 200.
Click “OK”
Now go to “File” then “Save As” and name the file. Change the file format to “.PNG”
Now go to “File” then “Open” then choose to open the image you want to use for the product. (This is the image you scanned in earlier, or one that already exists on your computer.)
Now that you have both your new file and the image you want to edit open, click and hold the image you want to use, and drag it over to the window with the blank Photoshop file. It should drop the image you want to use into the formerly blank file.
Now we get to adjust the image.
If the image is facing the wrong direction, you can rotate it until it is aligned properly. To do this, go to “Image” then “Rotate” then rotate it using the tools they provide until it looks okay.
As an alternative (but this is not required), you can put your mouse button very very close to the outline of the new image – then the mouse arrow should become a little arc with two points. If you hold down the left mouse button when this little arc pops up, you can drag the mouse around and rotate the picture (keeping the mouse button pushed the whole time). If you hold the “Shift” key while doing this, the image will snap into place in increments of about 30 degrees.
Now we should resize the image.
At each of the corners of the image is a little tiny box. Click on one of the tiny boxes and drag (hold down the mouse button as you drag). This will let you resize the image to fit the print area. You can also click on the image itself and drag it to move it around. When you have adjusted it to your liking, hit “Enter”
Now we should fix the rough edges:
If there are rough edges you need to delete, look to the lefthand menu in the Photoshop screen. It is the menu with little pictures of arrows and stars and Ts and such. These are your tools. Click on the box that looks like a rectangle with a white dashed line running around it. It should be the fourth button down from the top. Now create a rectangle around the area you would like to remove by clicking and dragging your mouse. This should make a small box. To finish removing the area, click the “Backspace” button on your keyboard. Make sure that you create a really looong rectangle – that goes all the way from one side of the picture to the other We prevent rough or jagged edges by making sure to go all the way across with our rectangle.
We can now fix the colors of the image in a few ways:
At the top of the screen go to “Enhance” then “Adjust Lighting” then “Brightness/Contrast.” Fiddle with these settings until you find a balance you like. You can always click "Cancel" to undo any of your fiddling.
If these results aren’t good enough, go to the top of the screen and select “Enhance” then “Adjust color” then “Adjust Hue/Saturation” or, if you feel like having some fun, “Replace Color.” You can fiddle with those settings as much as you like. If you want more detailed instructions, give me a call and we can go over them on the phone. Don’t be afraid to try them on your own – you can always click the “Cancel” or “Undo” buttons if you don’t like the results.
Don’t forget to zoom in and make sure there aren’t any weird fuzzies or scratches on the picture.
You can zoom in by holding down the “Ctrl” key on your keyboard, then, while still holding that button down, push the “+” key. This should zoom you in. If this is too tricky, go to the menu at the top of the screen and click on “View” then “Zoom In” or “Zoom Out” respectively.
If there are little fuzzy or dusty-thing issues, we will use the clone stamp to fix them. The “Clone Stamp” button is in the lefthand menu we used earlier. It is in the lower half of that menu and is just above the pink eraser, and right below the bandaid. Here’s a hint for the tools – if you let your mouse pointer hover (meaning not moving!) over each of the little tool buttons, in a few seconds, a little line of text will pop up, telling you the name of the tool!
Once you find it, click on the “Clone Stamp” button. Then zoom WAY in on the spot you want to fix. The closer up you get to it, the less any fiddling will show once we get the image to print. Now, find a good spot that you would like to essentially “copy” and “paste” over the spot that looks icky. Click on it and, at the same time, push the “Alt” key on your keyboard. This will copy the spot you want to use. Now drag (while holding down) the mouse button over the icky spot. Now release the mouse button. Next hold down the mouse button and drag again. Repeat. The icky spot should gradually begin to disappear, the more you repeat the dragging-and-clicking-then-release action. You can repeat this process with several different “good” spots to copy over the one “bad spot.” The goal is to fiddle until you have something that look completely blended in with the surrounding area.
If the mouse button on the screen is too large or too small, you can adjust it. It is like switching out your current paintbrush with one of a different size.
Just under the menu at the top of the screen (the one that says things like "File" or "Image") is a second menu. There will be a small button that says, “Size.” Next to size, it will say something like, “22 px.” Next to “22 px” there will be a tiny little black arrow. Click on it. A slider bar will come up. Grab the rectangle in the slider bar to make the mouse button larger or smaller. Then hold the mouse button over the image to see if you like the new size. This works with a lot of the other tools as well.
If the area you copied contrasts too much with the area you are pasting it over, you can adjust the opacity of the copied part.
First we should undo the part that was too opaque. Go to the menu at the top of the screen and click on "Edit" then "Undo." You can click "Undo" several times until you have gotten rid of the problem. If you accidentally click "Undo" too many times, don't worry! Go back to "Edit" then click on "Redo." You're all set.
Go back up to the menu at the top. Just under the menu at the top is the area where you adjusted the clone stamp (mouse button) size. A few sections over to the right is “Opacity.” Decrease the percentage of “opacity” to make the copied part more subtle when you are placing it over the icky part we want to cover up.
Now go back and cover up that pesky fuzzy spot.
If there are white rectangles around the image, we can now fill them in with a pretty color (if you want).
Make sure you are zoomed out so that you can see the whole image. On the lower right hand part of the screen there is a box called “Layers.” Click on the layer that says, “Background.”
Look over to the lefthand toolbar – go to the very bottom where there are two little boxes filled with color. Click on the one that says, “Set Foreground Color” on it when you let your mouse hover above it. This should be the leftmost color box. Now you can choose a color for the white spaces. There are two ways to do this.
Click on different areas of the painting itself. You will see the colors in the preview box of the color selector that popped up when you clicked on “Set Foreground Color.” If you find one you like, click “OK.”
You can also click around for colors in the color selector box. You can also adjust the color by clicking in different spots on the horizontal rainbow rectangle. When you find one you like, click “OK.”
Now look over to the lefthand tool bar and find the “paint bucket” tool. This one is near the bottom, just above the rectangle that is rainbow colored and a few tools below the pink eraser. Click on the paint bucket tool. Now, take the tool and click once in the white part of the picture that you want to make a color. If you like it, great! If not, go and find a new color!
If the “Paint bucket” tool is misbehaving , one option is to go to the tools on the lefthand side and select the “Custom Shape Tool.” This is also sometimes called the “rectangle tool.” It will be whichever tool is just below the rainbow rectangle and just above the raindrop. Click on the button for the tool and hold down. This will open up a list of tools you can use. Select the rectangle tool. Now click and drag so that the rectangle complete covers up the white space. Make sure that it goes all the way from one edge to the other. This way it will look nice for press! If this doesn’t work, give me a call!
Now we need to finish the file for uploading to cafepress.
Go to the menu at the top and click on “Layer.” Then click on “Flatten Image.” Now click on “Save” and make sure it has been saved as a “.PNG” file.
Now you can upload this to Cafepress! Yay!
Your tutorial for uploading to Cafepress is coming soon...
1.12.2009
Catching up #2
People who know me well know that I talk about San Francisco incessantly. I grew up there, for the most part, and it very much defines who I am. Without much warning I moved to Montana mid-high school, which also very much defines who I am. It's a strange existence now - I'm not sure if I'll ever feel fully at peace living in either place. I have dear friends and family in both Montana and California. If I had it my way, I'd relocate the friends and family to Northern Cali. Oh well. Dare to dream.
Anyway, I managed to go back to San Francisco for the first time in eight years over my Thanksgiving break. I have to admit that I started bawling when I caught a glimpse of my old neighborhood. I was born in our old apartment. Thrilled and saddened, I saw that the front door was exactly the same as when I left. In stealthy stalker mode, I snuck a peek through the window to the lobby. Also exactly the same. The front door to our old apartment, clearly visible through the window, had the same cheap wooden door as before. It was a replacement from the time my little brother tripped and fell forward into the glass pane that previously served as our front door. He nearly killed himself; the thing cut through his neck. He still has the scars today.
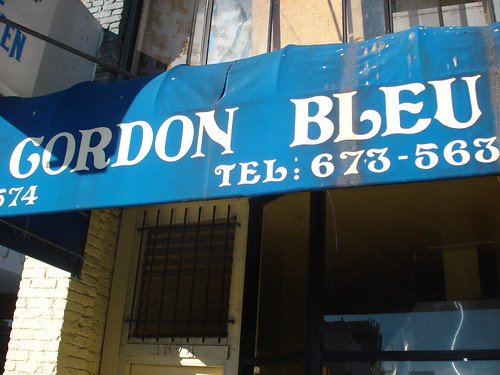
More important than my old apartment - the food. Several of my old haunts were still around, so I just had to get a taste of my childhood. Due to time constraints, I was only able to make it to one place.
 Mmm.
Mmm.

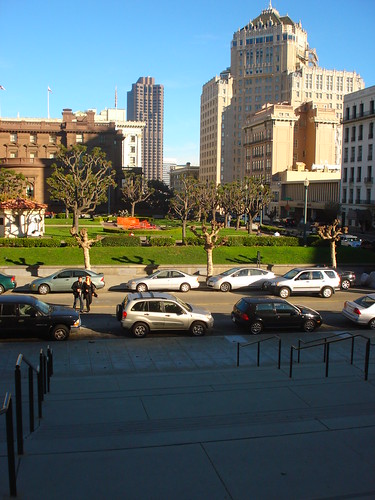
Post-food, I insisted that the boyfriend and I take a walk to my old park.
First, the church next to the park. If I were religious, I'd get married here in a heartbeat.


My park.
The trees were all ready for the annual lighting ceremony.
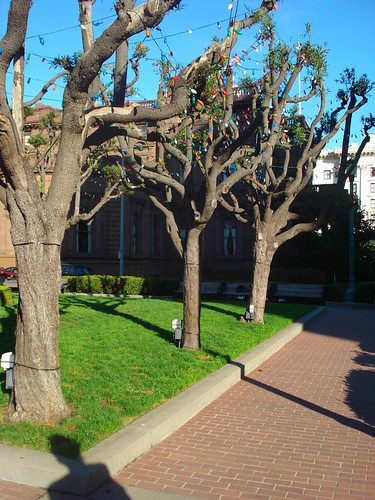
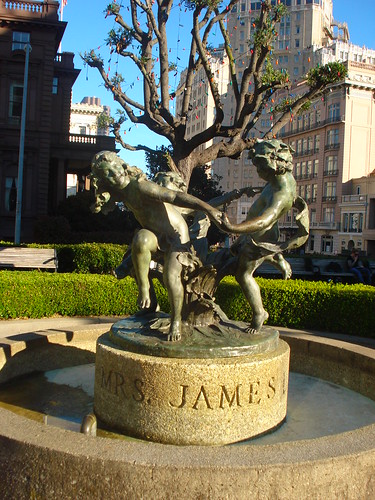 They end up looking like this:
 (Not my photo)
 (Also not my photo)
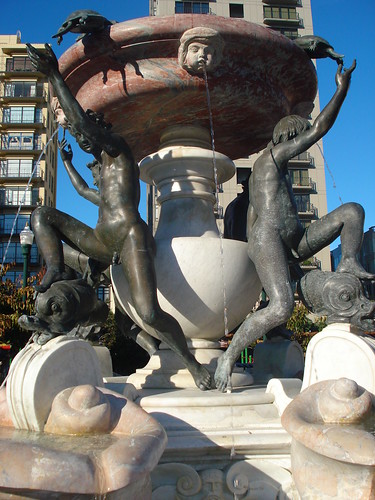
We also did a drive by of the Palace of Fine Arts.

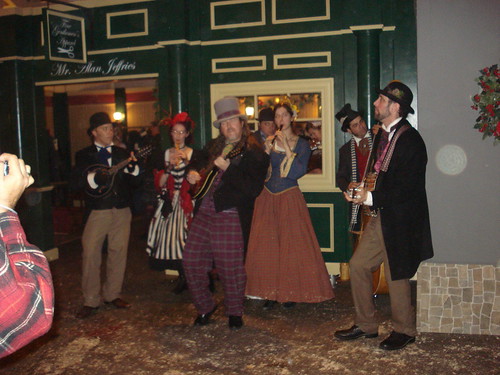
My lovely cousin got us tickets to the Dickens Fair at the Cow Palace (glamorous name, yes?). We dropped by on our way out of town.
I ended up chasing after a rabbit on a bicycle, trying to get a photo.
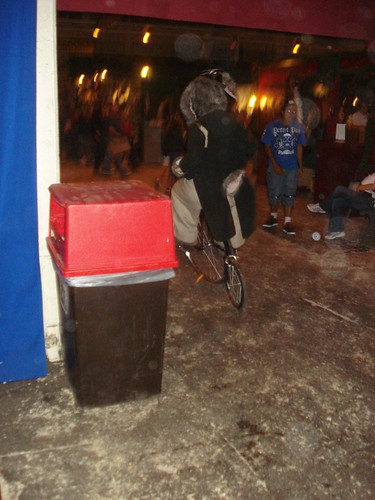
I didn't do a very good job.
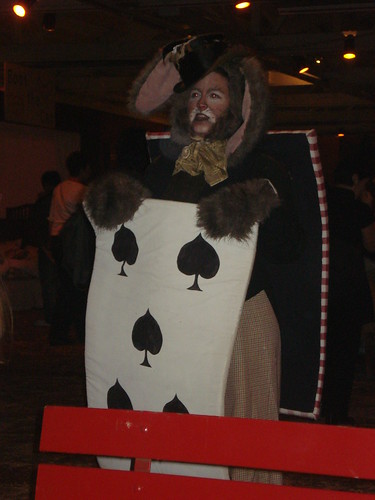
Well, at least I got one of him off-bike. I also ran into Samuel Pickwick.

Overall, a very fun trip, albeit short. I really enjoyed getting to know my family as an adult.
Did I just refer to myself as an adult?
Crap.
Anyway, I managed to go back to San Francisco for the first time in eight years over my Thanksgiving break. I have to admit that I started bawling when I caught a glimpse of my old neighborhood. I was born in our old apartment. Thrilled and saddened, I saw that the front door was exactly the same as when I left. In stealthy stalker mode, I snuck a peek through the window to the lobby. Also exactly the same. The front door to our old apartment, clearly visible through the window, had the same cheap wooden door as before. It was a replacement from the time my little brother tripped and fell forward into the glass pane that previously served as our front door. He nearly killed himself; the thing cut through his neck. He still has the scars today.
More important than my old apartment - the food. Several of my old haunts were still around, so I just had to get a taste of my childhood. Due to time constraints, I was only able to make it to one place.
Mmm.$8.95 for this:
Post-food, I insisted that the boyfriend and I take a walk to my old park.
First, the church next to the park. If I were religious, I'd get married here in a heartbeat.
My park.
The trees were all ready for the annual lighting ceremony.
They end up looking like this: (Not my photo)(Also not my photo)We also did a drive by of the Palace of Fine Arts.
My lovely cousin got us tickets to the Dickens Fair at the Cow Palace (glamorous name, yes?). We dropped by on our way out of town.
I ended up chasing after a rabbit on a bicycle, trying to get a photo.
I didn't do a very good job.
Well, at least I got one of him off-bike. I also ran into Samuel Pickwick.
Overall, a very fun trip, albeit short. I really enjoyed getting to know my family as an adult.
Did I just refer to myself as an adult?
Crap.
1.11.2009
Getting up-to-speed #1
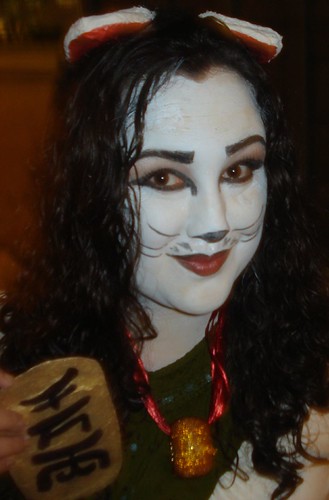
Halloween 2008 was a blast.
I managed to get my guy to dress up this year. A hastily created anime character costume was the result. I'd show you the outcome, but he's pretty anti-photos-on-the-internets.

I assure you, it looked exactly like this. With more fire.
After a lot of soul-searching, I dressed up as one of these.
 Google tells me they're maneki nekos. I've always called them lucky cats.
 I also got into the pumpkin carving spirit.
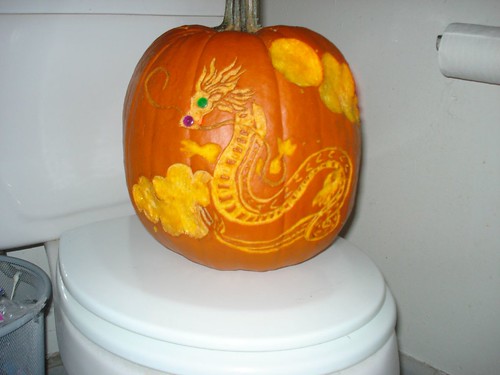
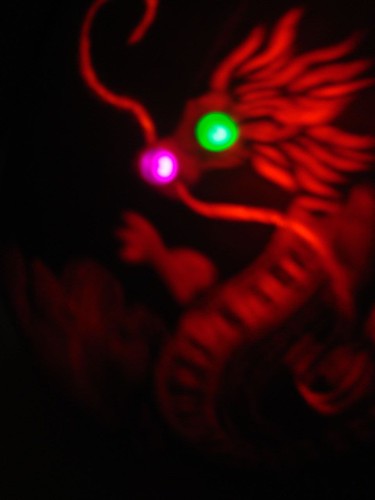
Maybe a little too into it. It took a good 6 hours to carve that thing. Next year, I buy real tools. Did you enjoy the picture of my toilet? The bathroom is the only place in the house with a bright light.
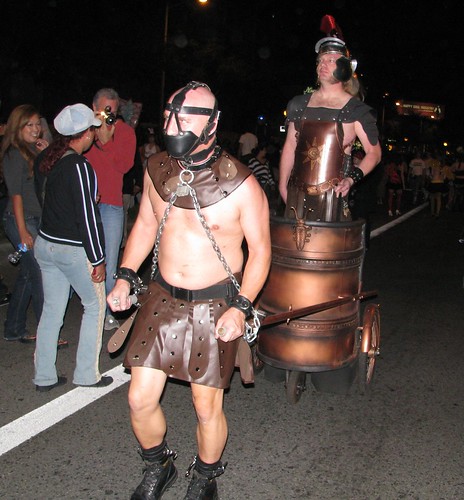
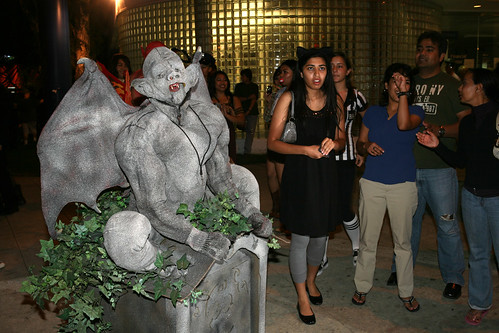
After a few hours of gussying up, the guy and I set out a big bowl of candy and headed out for the West Hollywood Halloween Parade.
The following photos are not mine:
 (taken by TomSaint11)
 (taken by RockinRobin)
 (also taken by RockinRobin)
 (taken by TomSaint11)
 (taken by CityofWestHollywood)
 (also taken by CityofWestHollywood)
 (also taken by CityofWestHollywood)
 (also taken by CityofWestHollywood)
There were hundreds of thousands of people at the parade. It was awesometastic.
I managed to get my guy to dress up this year. A hastily created anime character costume was the result. I'd show you the outcome, but he's pretty anti-photos-on-the-internets.
I assure you, it looked exactly like this. With more fire.
After a lot of soul-searching, I dressed up as one of these.
Google tells me they're maneki nekos. I've always called them lucky cats.I also got into the pumpkin carving spirit.Maybe a little too into it. It took a good 6 hours to carve that thing. Next year, I buy real tools. Did you enjoy the picture of my toilet? The bathroom is the only place in the house with a bright light.
After a few hours of gussying up, the guy and I set out a big bowl of candy and headed out for the West Hollywood Halloween Parade.
The following photos are not mine:
(taken by TomSaint11)(taken by RockinRobin)(also taken by RockinRobin)(taken by TomSaint11)(taken by CityofWestHollywood)(also taken by CityofWestHollywood)(also taken by CityofWestHollywood)(also taken by CityofWestHollywood)There were hundreds of thousands of people at the parade. It was awesometastic.
1.09.2009
Please forgive me...
Dear blog-o-mine,
I have been severely neglecting you. It isn't anything you did; the fault is mine, and mine alone. I have failed you.
I promise to make it up to you very soon. I have had many adventures since we last spoke, so I very much hope you will feel the wait was not for naught.
XOXO,
Cat
I have been severely neglecting you. It isn't anything you did; the fault is mine, and mine alone. I have failed you.
I promise to make it up to you very soon. I have had many adventures since we last spoke, so I very much hope you will feel the wait was not for naught.
XOXO,
Cat
Subscribe to:
Posts (Atom)

